

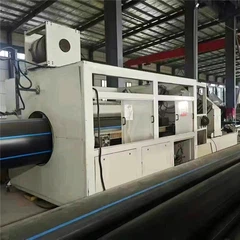
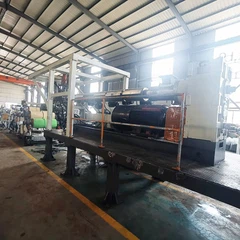
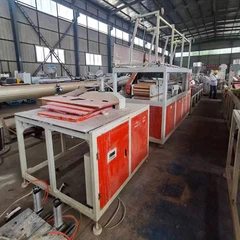
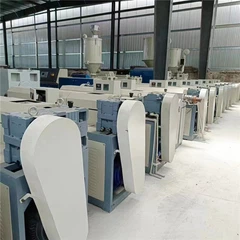

Selecting the right die for a used extruder hinges on careful matching and thorough inspection. Since the condition of the machine is unknown, you must pay close attention to the die's specifications, physical compatibility, and quality to ensure that the new die works seamlessly with the existing equipment and produces conforming products.
Step 1: Conduct a Comprehensive Assessment to Understand Equipment Details
Key Parameter Review: Carefully record the extruder's screw diameter and length-to-diameter ratio, as these determine the range of die outputs the equipment can accommodate. At the same time, confirm the equipment's maximum stable output; the die's applicable output must fall within this range to ensure stable production. You can compare the information on the machine's nameplate or specification sheet with commonly available specifications found online.
Equipment Condition Assessment: Carefully inspect critical components such as the screw and barrel for severe wear, as this can affect melt conveyance and plasticization efficiency.
Inspect Connection Interfaces: This is the area most easily overlooked. Measure the dimensions of the die mounting flange, bolt hole positions, and center height to ensure a precise fit with the new die. If the interfaces do not match, subsequent modifications will be very difficult.
Confirm Control Compatibility: Understand the control system of the existing production line (such as the brand and model of the PLC) to ensure that auxiliary equipment, such as the haul-off unit and cutter, can be successfully integrated and synchronized for control after the new die is installed.
Step 2: Precise Matching and Defining Production Requirements
Once you have a clear understanding of the equipment's specifications, the next step is to find the right match based on your product goals.
Determine the Final Product: Identify the type of product to be manufactured-whether it is pipe, profile, sheet, or film-as this directly determines the basic structure of the mold.
Match Mold Specifications: The mold's product size range must cover your product specifications, such as the diameter of pipes or the width and thickness of sheets.
Selecting Structure Based on Material: The rheological properties of different materials vary significantly, so mold design must be adjusted accordingly.
PVC, PC, etc.: For high-viscosity materials such as rigid PVC, a streamlined runner design is required to reduce melt retention and prevent localized overheating and decomposition.
PP, PE, etc.: For low-viscosity materials like PP, a neck-down structure can be used to control flow rate and prevent excessive expansion of the melt at the outlet.
Composite materials: If producing multi-layer composite products (such as PC-UV laminates), a multi-layer mold equipped with a co-extrusion distributor must be selected.
Review mold design details: Special attention must be paid to critical structural design elements. For example, the compression ratio (typically 3–6:1) must match the material and product requirements; a ratio that is too low or too high will affect quality. Additionally, the runner should be streamlined and have a smooth surface to prevent material degradation.
Confirm Material and Process: Based on the corrosiveness and abrasiveness of the processed material, as well as the product's cleanliness requirements, determine whether the mold material should be tool steel, stainless steel, or cemented carbide.
Step 3: Evaluation and Inspection to Identify High-Quality Molds
Once the parameters have been matched, the mold itself must undergo a thorough inspection, as its quality determines both the quality of the final product and the mold's service life.
Inspecting Mold Quality: A high-quality mold should have smooth, flat, and glossy inner and outer surfaces, and feel substantial to the touch. Be on the lookout for any burrs, pits, or signs of rough machining.
Focus on Adjustability: Prioritize molds equipped with precise adjustment mechanisms, such as those capable of independently adjusting the gap between the upper and lower mold lips and the airflow. This is crucial for quickly adjusting product thickness and shape on used injection molding machines.
Calculate Error Margin: All molds have manufacturing tolerances. It is best to test the mold before purchase to understand its actual precision and assess whether the error is within an acceptable range.
Verify maintainability: Ask the supplier if they offer repair and modification services for used molds, as this is often more cost-effective than purchasing a brand-new one.
Evaluate material and workmanship: Check whether the mold material meets processing requirements. If processing PVC, ensure the mold has sufficient corrosion resistance; if processing glass-fiber-reinforced materials, ensure it has high wear resistance.
Step 4: Proper Installation and Commissioning
Once the die is delivered, proper installation and commissioning are the final steps to ensure it performs at its best.
Pre-installation Check: Before installation, be sure to double-check the parallelism between the die and the extruder flange to ensure uniform clearance between the mating surfaces and prevent material leakage.
Cleaning and Preheating: Thoroughly clean the mold mounting surface and preheat the mold. The preheating temperature should be close to the production temperature to avoid thermal stress deformation.
Proper Installation Procedure: Lift the mold slowly and steadily to avoid impact or damage. Tighten the connecting bolts gradually in a diagonal sequence to ensure even force distribution.
Comprehensive Inspection: After installation, inspect all water, oil, air, and electrical lines to ensure they are correctly connected and free of leaks.
Fine-Tuning: This is critical for determining product quality. You need to fine-tune the die gap (to ensure uniform wall thickness), balance the extrusion and haul-off speeds (to eliminate surface defects in the product), and adjust the cooling and shaping systems (to ensure dimensional stability).
Step 5: Balancing Budget and After-Sales Service
Assess the total cost: In addition to the price of the mold itself, be sure to factor in potential additional costs such as interface modifications, repairs, and refurbishment.
Confirm after-sales service: Verify whether the supplier can provide timely technical support, repair services, and necessary spare parts.
In summary,
Selecting a die for a used extruder can be viewed as a meticulous upgrade for older equipment. This requires extra care and patience at every stage. From equipment evaluation and parameter matching to die inspection, installation, and commissioning, precise control at every step provides a solid foundation for future stable production, cost reduction, and enhanced product competitiveness.